By Carl Valle
One common request that coaches and athletes have is the best way to set-up timing to get 40 yard dash times or other short sprint tests. When trying to get times, it’s important to understand what information one needs, be it how many splits in 40 yard dash one can do with three to four transmitters or if one wants to replicate what the NFL combine does with a manual (human hand time) start. Many coaches want to get precision and reducing the human error can be done by using the touch and release option or a timing gate to get one’s body passing a specific distance. For three years I have used Freelap and find that the best options are the ones that are simple to set-up and allow the coach or individual to see change, ideally improvement.
Understanding Starting Options
Most people are looking for running times, or the period when an athlete starts moving and finishes up the distance they are being tested at. Coaches are looking how fast one can move their entire body or the center of mass from point A to point B, so timing should reflect first movement (initiation of displacement) versus first motion (just an action that results in little contribution to acceleration). Freelap offers primarily three timing options for starting, that can be used to help capture times of the 40 yard dash or similar short sprint tests.
Electronic Hand Time First Movement
Hand timing the first visual movement requires another person to press the remote trigger when they first see movement, usually in the head and arms. Like mentioned earlier in How fast could Usain Bolt run the 40 yard dash, a reaction time will vary a bit and make the first ten appear a little faster, but this is a common approach and still is used in the NFL combine. Although this timing approach is not as accurate as fully automatic timing, some coaches are still using this method to compare with historical data. Most coaches that are looking for more accurate times wish to remove the human element and elect a more automatic electronic option.
Electronic First Motion Initiation
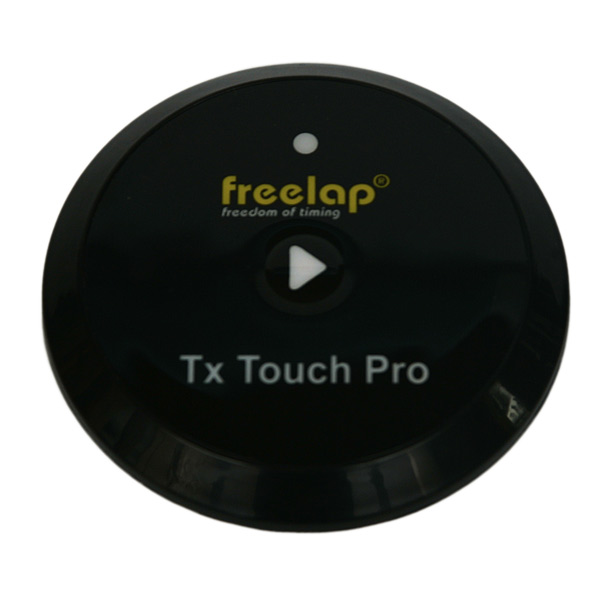
The touch and release is sensor that detects when the hand first moves as any slight change will likely trigger the timing to start. When the athlete breaks contact with the hand sensor the timing begins. Since most combine starts usually are three point starts, in which the hand is resting on the ground, the first motion is a very accurate way to capture the starting process of acceleration. Again the sensor is detecting a slight rise of the hand coming up from the starting position, mere millimeters, the most common and appropriate movement from a three point start. The initiation of the arms coming up doesn’t necessarily indicate that the athlete is displacing their body, since it takes a little more time for the legs to apply enough force to overcome inertia, but it’s a consistent and repeatable motion that can add more accuracy to timing than visual first movement.
Electronic Departure Moving Start

Freelap Tx Junior Pro Transmiter – the watch is triggered as the athlete begins to move towards the transmitter.
Some athletes just like a natural start without any type of device touching them, and that choice creates a decision on what to use to determine motion if they are not in contact with a sensor. A common approach is to use a sensor one to two meters out and just place the rest of the sensors at locations to collect splits or the final 40 yard dash. While it’s technically timing a shorter distance in total and the times will not be representing a full 10 yards or 10 meters, the results are useful to gauge improvement or change. Coaches are trying to monitor improvements in speed and times help reveal progress, so practices are very effective in achieving the simple goal of measuring improvements in acceleration. The key is to be consistent in placing the transmitter the same distance away from the starting line every single time. This is one of the most popular set-ups because one can do flying sprints with just one receiver watch and two Tx junior transmitters.
Deciding on What Time Segments or Splits to Capture
With just two transmitters, anyone can get a time (except hand time first movement) by themselves automatically, but just having one total time is often not enough information to decide on training unless you are timing just the first 10 yards or meters. Most want to capture not only the 40 yard dash, but the first ten or every ten yard segment preceding it.
Timing the 40 yard dash
Timing just the forty requires just a receiver watch and belt around the waist of the athlete, one TX junior and one starting transmitter of choice. The result will be the total time from start to finish of the 40 yard dash or similar distance.
Timing the 40 Yard dash with first 10
Timing the forty with the first 10 requires just a receiver watch and belt around the waist of the athlete, two Tx juniors and one starting transmitter of choice. The result will be the total time from start to finish of the 40 yard dash, and the splits from 0-10 and 10-40.
Timing the 40 yard dash with first 20
Timing the forty with the first 20 requires just a receiver watch and belt around the waist of the athlete, two Tx juniors and one starting transmitter of choice. The result will be the total time from start to finish of the 40 yard dash, and the splits from 0-20 and 20-40. The only difference is that the transmitter is placed an additional 10 yards away and is popular in training with many coaches. When coaches are focusing on a smooth execution of more of the acceleration, in order to encourage patience and control, this option is especially useful.
Timing the 40 yard dash with first 10 and first 20
Timing the forty with the first 10 and first 20 requires just a receiver watch and belt around the waist of the athlete, three Tx juniors and one starting transmitter of choice. The result will be the total time from start to finish of the 40 yard dash, splits from 0-10, 10-20, and 20-40.
Timing the 40 yard dash with all segments or splits
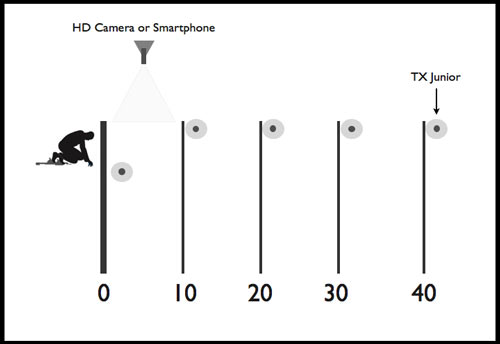
Timing all of the splits requires four Tx junior transmitters, a receiver watch, and one starting transmitter of choice. The full split set-up is very useful for getting all the data needed to see how the athlete is accelerating for 40 yards. Many track and field coaches can use this same set-up but stretch the acceleration distance further away up to 60 meters by adding more transmitters. The full split set-up is the most comprehensive way to evaluate the 40 yard dash with timing systems.
Where to Video or Watch

Splits for the 40 yard dash.
At the end of the day coaches and athletes want to get both a good workout in and the ability to capture data, including video. A combination of video and times are helpful, even if one isn’t focusing on technique for that given session. Many coaches look from the side to see how the athlete is performing, but from straight on or behind video is good catch asymmetries and compensations. Depending on what you are trying to see, how close you are to the running lane or area will vary. Those that want to focus on the first few steps should be about half way between 0-10 and about 20-30 feet away to pan if videoing or just have a good perspective if just eyeballing. As the length increases, the athlete can again move the halfway point of the run distance they are focusing on and step a little further back to get video or see the entire run in a broader perspective. Watching from right behind is useful for seeing lateral stepping during initial acceleration and videoing from the front with a long distance zoom is great for seeing compensations and excessive sway or crossing over. After getting both timing and video, coaches can use both technologies to assemble a reasonable plan based on what the athlete is doing and what the athlete is achieving with speed.
Please share this article so others may benefit.
[mashshare]

